Comment

What do 3,000 sales look like?

It says it right there at the top of my shop: “On Etsy since 2008”

Years before using Etsy as a selling platform, I sold vintage fashion on eBay. Then when Etsy came along, I decided to make the jump. It has been 10 years now on Etsy, half the time denisebrain has been in business, and my shop recently reached the milestone of 3,000 sales. Would you like to see what 3K pieces of vintage finery look like?

giphy.gif

OK, so that’s not half—it’s not even close to half, but I figured it was sufficiently dizzying!

To celebrate, I am offering 25% off any sale of $50 or more from my Etsy shop through January 26. Just use the coupon code HAPPY3000 when you check out, or use this link to receive the discount automatically.

Now, what do 3,000 sales look like on my face?

il_fullxfull.778045650_i2pl.jpg

Yup, I’m pretty excited! Thank you!!

Comment

Comment

Denisebrain best of 2018

It’s time once again for my annual round up of favorite vintage sold last year. It’s always so hard: One can’t choose everything, but I really do fall in love with the things I sell, and this fact comes through in the sheer lack of editing down you can witness below. Sorry not sorry.

Also in the mix you will catch a glimpse of a few customer images, and you can see more of these on the Vintage You page.

You will also see a lot of non-me models in my photos here. I’ve gone from being terrified of having anyone but me in my shots (because I was afraid that no one would know it was my shop anymore) to being overjoyed for the unique character that all the models have brought to my clothes. This is what I want for my denisebrain business, a feeling of everyone being welcome in. I think the models are helping me show that, and I’m so grateful to them all.

I have a lot—I mean A LOT—of vintage to show you in 2019, so hold your horses!! (And yes, there will be more wooden horse pins!)

I hope you have found as many unexpected reasons to smile this year as I have, and that 2019 brings us all our share of joy, health, love, and hope—oh and of course, vintage!

My very best to you, Maggie of denisebrain

Comment

Comment

So thankful

My most sincere thanks—for everything.

I am thankful every single day that I am able to run my vintage fashion business. I have met the most wonderful people through vintage. You are customers, colleagues, collectors, historians—stylish, fascinating, caring people with so many stories to tell. And you even put up with my talk of manatees!
 

You read my blog, my newsletter, and my wordy (!) item listings, you visit my website and let me know what you think. You cheer me on when I do a good job, and forgive me when I make a mistake. You constantly make me realize that we aren't such a bad lot. Thank you.

I wish you every happiness on Thanksgiving Day, and hope you are surrounded by all that you love best.

1950s-vintage-thanksgiving-cards-1.png

Comment

Comment

Gray Friday

…and you thought it was Black Friday


I always donate 10% of sales to the Save the Manatee Club, but now through next Tuesday, a full 50% of my sales will be donated for the protection of this beloved endangered species. I am calling this my Gray Friday fundraiser. I also have an Everyday Hero page set up for donations, in case no vintage finery from my shop beckons. My goal is to reach $400 between now and Tuesday, November 27. With your help, I know this can be done.

Manatee painting by Anna Davies

Manatee painting by Anna Davies

Of mannequins and manatees

I know what some of you must be thinking: What is it about the manatee that attracts a vintage clothing seller? Well, I'll tell you.

It all began about a dozen years ago when I was visiting relatives in Florida, and they took me to an area where manatees are sometimes seen. We saw plenty of alligators and beautiful birds and plants, but not a manatee. Then, as we were getting ready to leave, a truck pulled up, and a group of people jumped out to lift a manatee down to the water, cradled in a sling.

My manatee moment, Blue Springs, Florida

My manatee moment, Blue Springs, Florida

You see, this manatee had been rescued and rehabilitated after being found injured by a boat strike, and was now strong enough to be released back into the wild. As the manatee gently swam off, another manatee came up from the bottom of the stream and nuzzled the returnee...an unmistakable greeting.

Tears were streaming down my face. I was IN LOVE with manatees!

I decided then and there to learn about this endangered species, and to help it survive. I believe this fits pretty neatly with my—and many vintage lovers'—interest in walking a bit more gently on the Earth, recycling instead of buying new clothes. It's just one of many reasons to love vintage, but it's a mighty good one.

Thank you for caring right along with me!

That’s not all that’s going on

Right now and through November 25, with every purchase of $100 or more, you will automatically get 20% off in my Etsy shop.

Saving money and saving manatees? Talk about a win-win!

Comment

9 Comments

Whose dress was it?

I am asked fairly often if I know anything about the original owner of a vintage item. What did she do, what did she look like—who was she?

I have written about some of the women I have either met or gotten to know a bit through their clothing, and it’s about time I updated with a few more. I don’t always have the good fortune to know anything about an original wearer of the vintage fashion I find, but when I do I pay close attention so I can share their stories.

static1.squarespace.jpg

I’ve written about Jacqueline, the mother of a very good friend of mine (I love my vintage clothing sources)

 
static1.squarespace-1.jpg

Juana, who worked as a model for one of Spokane’s department stores (Another favorite source)


static1.squarespace-3.jpg

A woman I only know through her grand niece (The suitcase lot)

static1.squarespace-4.jpg

Mrs. Gordon, whose husband was blinded in WWII yet she dressed to the nines (You’re a sight to see, Mrs. Gordon!)

 
static1.squarespace-5.jpg

Alice, about to be married for the second time at the wonderful age of 85+ (Lovely lady lot)

 
static1.squarespace-6.jpg

Betty, who was a manager at one of Spokane’s department stores (She’s a Betty)


There are more, and they have been so gracious to me. I have many unofficial grandparents!

static1.squarespace-7.jpg

I think of Ruby, who made her own clothes with impeccable skill and cried when I offered her money for the clothing, which she was just going to “put out on the curb.” All 100+ pieces of it!

 
static1.squarespace-8.jpg

Mrs. Walls, who had “forgotten she had all these clothes” in her basement

 
static1.squarespace-9.jpg

Shirley, who let me come to her garage sale way out in the country a day early because she figured no one would care about the clothes (there were enough to open a store)

 
whitebigdottuniccarol3.JPG

Carol sat on the stage with her boyfriend, the pianist with Lawrence Welk, while they were taping shows.

 
static1.squarespace-10.jpg

There was the gentleman whose wife had passed away and he was finally ready to let go of some of her clothing. He gave me a fantastic set of highballs he bought at the 1963 Seattle World’s Fair when he found out I’d grown up in Seattle.

 
static1.squarespace-11.jpg

One man I met had just purchased and laid down a load of stones to make his driveway a little smoother for my visit. His wife had been a manager of better sportswear at a department store in Spokane. We talked quite a bit because my father played jazz trombone and he had a boatload of jazz albums and played jazz himself. He asked me where I thought he got his accent and I guessed New York. He said Chicago, which is his nickname. He came to Spokane when he was 12 and he was then 105. 

 
static1.squarespace-12.jpg

Then there was Elaine who was sweeping her walk when I first met her. She is African American and came to Spokane on V-J Day, September 2, 1945. Her clothes were so precisely cared for and pristine that they were as if new.

 
static1.squarespace-13.jpg

There are many more. One that truly haunts me was an Italian-American model whose daughter offered me her mother’s clothing. She had wonderful items, including this Howard Greer dress. I happened to see her photo and she was one of the most beautiful women you could possibly imagine. She had died estranged from her family and had a very hard life, including alcoholism. Her clothing was very well kept and of spectacular design.

 
BeFunky Collage copy.jpg

Sometimes there are the hints of a prior owner, left in bags or pockets. I’ve written about some of these in The contents of a vintage pocket and the dating of vintage


Sometimes there is a name tag or signature.

 
hatgoingaway51.jpg

I especially love it when items have notes or pictures with them, giving us an idea when and how something was worn.


One of my most recent acquisitions is an intriguing (and large!) collection that belonged to a ballet dancer and her mother. Both apparently dressed to be center of attention—the dancer just more youthfully. Many things were altered or embellished…there is an overwhelming sense of flair to everything belonging to these women, which seems fitting!

ballet.jpg

I like to think that we perpetuate these people through carrying their stories—along with their clothing—forward.

9 Comments

Comment

Spectacular Modern Art Poster Print Dress

Every now and then I get to offer something that brings tears to my eyes. If I’m feeling even the slightest bit jaded about vintage clothing, the passion comes roaring back when certain items come up.

Right now in my Etsy shop, I’ve just listed such an item, a dress in excellent shape, cut of silk. It looks like a Beatnik top with a printed skirt, but it is all one piece. The top is black silk shantung, and the skirt is silk surah. What makes the dress so special is the skirt print: Reimagined in orange, brown, gold, lilac, black, and white, are actual modern art exhibition posters that date from 1950 through 60.

artpostercollage.jpg
Photo-Nov-01,-1-12-02-PM.jpg

The art exhibitions took place in France, Germany, and Japan, and were shows of the works of Joan Miro, Henri Matisse, and Pablo Picasso. I have located originals of these posters available online, and they are glorious works in themselves.

Imagine wearing this dress to a gallery opening, or an art museum—You would feel among the works of art!

2.jpg

Comment

What Color is Your Parachute (er, Scarf)?

8 Comments

What Color is Your Parachute (er, Scarf)?

parachute.jpg

Richard Nelson Bolles’ What Color is Your Parachute was self-published in 1970, and since 1972 has gone through 40 commercially-published editions, translated into 22 languages, and sold over 10 million copies. After reading it many years ago, I felt like it expanded my perception of what was possible in a career.

At the same time that Bolles’ book first became widely available, Vera Neumann (1907 - 1993) was flying high. Her parachute cloth (more about that in a second) had been unfurled and printed in ecstatic colors, becoming a form of modern wearable art. Glitterati and career women both wore Veras—whether wrapped around ponytails, necklines, or waists, they gave a fresh, expressive look to an outfit.

The more you look, the more you see

“Color is the language I speak best” —Vera

Vera Neumann used to be simply Vera…the one and only Vera. Now we call her by both names to differentiate her from the newer Veras (Wang and Bradley) on the scene. She was born Vera Salaff on July 24, 1907. A truly prolific designer, she got a good start from her father, who took her to the Metropolitan Museum of Art every Sunday, and gave her 50 cents per art-filled sketchbook as a child.

Vera met and married Austrian George Neumann in 1943, and together with their friend Frederick Werner Hamm they began silkscreening textiles in their studio apartment in Manhattan, calling their business Printex. They started out with just placemats because they were curing these in their own small oven. The business, and the space required, expanded rapidly after Hamm secured their first order from B. Altman. It was during the peak of World War II when linen became difficult to obtain that Vera first came across some parachute silk being sold at an army surplus store. By the late 1940s she had expanded from home textiles to scarves made of parachute silk.

Vera was the very first to sign her name to a scarf, as an artist signs a painting. In the 1950s her work was popular with Marilyn Monroe, Bess Truman and Grace Kelly. John Lennon was the first customer for a Vera painting when her oils were shown in 1970. Department stores started presenting her scarves like artwork in the early 70s. By 1977, Vera’s sales were over $100 million.

A tour of Vera’s history in 2:25. Time well spent.

The designs of Vera Neumann took many forms over the years, ranging from the small, often botanically-inspired designs, to boldly patterned, modernist abstracts. She obviously loved juxtapositions of bright colors, and gave a lot of thought to how her layout of pattern could make an interesting scarf. There is a consistent love of detailed natural elements and energetically free brush strokes. Nothing looks like the paint has even dried yet, so fresh are her designs.


How many scarves To make a parachute?

Dizzy yet?


I recently acquired a large drawstring bag filled with scarves. How large? Large enough for Santa to sling over his shoulder and make children feel giddy, only in this case I’m the one who is giddy. The bag came from one woman, and most of the contents are scarves made by Vera Neumann between 1960 and 1982. 

I don't know the woman who collected these scarves, but I know a few things about her based on her collection. She loved Vera of course, and she wore just about every color, some more often than others. I have had to put aside over 30 of the scarves because their wear has been a little too much (these are now in the hands of a colleague for her reuse). Very special designs I believe the collector kept rather carefully, protected from overuse. Most of the very best were not overused. 

I have been given a few Vera scarves as gifts through the years, and admired the ones I've found secondhand, but never have I seen 100+ of Vera's scarves at once before. 

Right now you will find 40 or so Veras in my Etsy shop, and there are more to come. But caveat emptor: This batch is going fast.

b05e46d091918b80184fef41a81b2f2b.jpg

The best parts of this world were not fashioned by those who were “realistic.” They were fashioned by those who dared to look hard at their wishes and then gave them horses to ride.

Richard N. Bolles, What Color Is Your Parachute? 2016 edition

Vera may have needed to use parachute silk at one time in her life, but she had no trouble with flying high.

How fortunate we all are to be able to wear such an artistic flight of fancy as a Vera scarf, having to think about tying ideas instead of fit—and to make the world brighter and more interesting at the same time.

Do you have any Vera scarves yourself? What color is your Vera?

8 Comments

2 Comments

The Magtone Color of the Moment: Jazzberry Jam

Screen Shot 2018-09-19 at 10.43.06 AM.png

The highly vetted Pantone Color of the Year for 2018 is Ultra Violet. Where Pantone is going for next year is not yet known, but I have my own Magtone prediction, which is a blend of shocking pink, red and violet, called Jazzberry Jam. I didn’t make that name up—go google HEX color #BD0048—yet it seems appropriate because I got the idea from jam.

How do I vet my color choices? Well, this one came to me when, on a late summer Sunday, I was having a piece of toast and the black currant jam clinging to the side of a jar was sparkling in the sunlight at our kitchen table. My eyes started tearing up, and I felt it in my soul. That’s it.

Black currant jam. Photo by Coprid/iStock

Black currant jam. Photo by Coprid/iStock

I guess it would be possible to rationalize my feeling for this color. Right now we are a couple of years into what can be argued is a new feminist movement with bright pink often being used as a symbol of women’s strength. Red is a color of urgency, and purple is a color of authority and power. Mix them together, and you might just have the place we stand in history—and possibly with a color that symbolizes women’s rise in politics. (Need proof of that rise? A record 185 women have been nominated for House seats in 2018.)

So, with this beautiful shade in mind, of course I had to go looking for vintage fashion that showed it well. Feast your eyes on shades of Jazzberry Jam from vintage sellers on Etsy. As of today these are currently for sale and the links are in my Etsy favorites collection on the subject. It makes a very rich formal shade, looks lovely in velvet, iridescent fabrics and jewelry. In short, it makes a great color going into our Northern Hemisphere’s winter—and the November midterm elections in the U.S.

jazzberry1.jpg
jazzberry2.jpg
pantone-colors-2019-1-1521147306.jpg

And hey, I may actually be on to something with this Jazzberry Jam thing: This is an image from Elle Decor, looking toward the predictions from Pantone for 2019. I may not be the only one feeling this!

What about you—Do you like this color? Do you wear it? What does it say to you?

2 Comments

Comment

International Manatee Day

Manatee Hugger...guilty as charged! 

Manatee Hugger...guilty as charged! 

If you have read my blog for any length of time you know I'm awfully fond of the manatee. Some people even know me as "the manatee lady" — I think that's supposed to be a compliment!

But can we get serious for a minute?


Humans are the gentle herbivores’ only threat, with our fishing lines ensnaring them, our pollution poisoning them, our boats striking them and our living space encroaching upon theirs.

The pressure on this species is greater all the time, with increased human population, loss of habitat, and more use of watercraft. 

Loss of wintering grounds, harassment of manatees at some locations, degradation of water quality and the loss of vegetation upon which manatees depend have all taken and will continue to take a toll.

This year's huge manatee death toll due to red tide is evidence of the tenuousness of the survival of the species in Florida waters.

This is not a story that can end well for the manatee without our help.

Consider the importance of these animals to our national conscience. Heather Sellick of the US Scuba Center wrote: “the manatee is one of the most magnificent marine mammals...it is also the one that tugs at our heartstrings and reminds us of the great damage humans have inflicted on the creatures with whom we share this planet.” 

I don't want to live in a world without these wonderful creatures.

Photo: Public domain

Photo: Public domain

Illustration of me by Anna Davies Art

Illustration of me by Anna Davies Art

Today is International Manatee Day, and the day marks the 2nd anniversary of my setting aside 10% of all denisebrain sales to Save the Manatee Club for the protection of these beloved and imperiled animals. I will make another donation on behalf of denisebrain's customers today, with gratitude to all who support me in this.

Comment

2 Comments

Keeping my aunt's memory alive through her clothing

My aunt Marie with me at the tender age of one—I think I was eating her light meter. Look at Marie's striped cotton beach shoes!

My aunt Marie with me at the tender age of one—I think I was eating her light meter. Look at Marie's striped cotton beach shoes!

This is a little homage to the clothing, especially the prints, my Aunt Marie wore. She died when I was just 3, but I still have a few of her clothes. I wish I had more.


Marie.jpg

Here she is in the late 50s. She was born in 1899, so she was in her late 50s too. Just look at the skirt! I would absolutely wear the whole look (including the glasses) right now.

Me at 19 or 20 wearing Marie's French guard print shirt. I finally wore that poor shirt to death! 

Me at 19 or 20 wearing Marie's French guard print shirt. I finally wore that poor shirt to death! 

At the time of Marie's death, my family gathered all her household possessions, and some of her costume jewelry (she had a penchant for colorful rhinestones) and clothing survived in our basement until I was old enough to decide I really liked it. Some of my first vintage wearables came out of boxes of my aunt Marie's possessions. I remember especially liking the prints, including one with an 18th-century French guard motif on brushed cotton. I started wearing it when I was about 15 or 16.

Screen Shot 2018-07-31 at 11.35.01 AM.png

Aunt Marie was a school music teacher, and had some really great music-themed prints, which I imagine her elementary school students loved. This sash, printed with antique musical instruments, was part of her stash. I wonder if it had a dress or blouse to match?

Screen Shot 2018-07-31 at 11.34.45 AM.png

I've worn this big Western print rayon scarf of Marie’s since I was something like 14...approximately forever. It is even large enough to tie into a top like this.


I love knowing my Aunt Marie through her clothing. As ephemeral as mere woven and knitted yarns can be, it is an incredibly powerful way to connect to a past generation.


Do you keep anyone's memory alive by wearing that person's clothing?


2 Comments

Comment

Care of Vintage: Basic Mending

If you've followed the progression of my Care of Vintage posts, you will know that I'm writing these in anticipation of including the material in a book which I'm tentatively calling Getting Started With Vintage—a Modern Woman's Guide

One of the best things about being this Modern Woman for whom I'm writing is the vast amount of information she can find online. In researching available texts, websites, and videos about basic mending, I have been bowled over with the quantity of really good information. Especially great for many of us are step-by-step video tutorials. I believe it is beyond the scope of my book to describe sewing techniques, but I am confident that, knowing what to look for, the beginning sewer can find what she needs to get started.
 

blacksweater2book-1.png

If you know how to sew, you are well on your way to being able to take care of the mending needs of your vintage finery. If you are already a seamstress, my best advice is to consider the way the garment was originally sewn in your repair work. Respect what has been done to the best of your ability and your work will blend in, even if this means (for instance) not using the newest gadgets on a modern sewing machine.

For those who don't know how to sew, or need a refresher, this section is about the most basic sewing skills that you may want to learn to do yourself. I know there is every kind of "modern woman" out there, and some will take off and fly with sewing, others will grimace at the very idea of threading a needle. For the reluctant, a seamstress can do these tasks for you. For the potential aviatrix, I have included some links to get you started.
 

Although it certainly is nice, you don't have to have a sewing machine to do basic mending. Equip yourself with a sewing kit for hand mending if you don’t already have one. Included should be spools of thread in basic colors, various hand sewing needle sizes (including sharp, fine needles to slip through silk and smooth rayon), beeswax to run your thread over to keep it from tangling, small thread-snipping scissors, a seam ripper, sharp pins, and a pin cushion. You will want to keep a collection of replacement fasteners including hooks and loops, and snaps in various sizes. You can scout for vintage sewing items at flea markets and yard sales, although many of these haven't changed significantly in 100 years or more, so new will do fine. 

I would suggest you consider managing at least these mending jobs:

  • Resewing or replacing of loose or missing buttons and other fasteners

  • Restitching an open or loose seam

  • Bringing a snag to the inside of fabric

  • Removing pilling

  • Restitching a loose or missing hem

  • Closing up tiny holes in sweaters

  • Getting a sticky metal zipper to run smoothly

One online set of very clear tutorials for beginning hand sewers is monkeysee.com's "How to Sew by Hand" video series. 

If you are a little farther along in your skills, you can add patching holes and mending tears, discreet mends in lace, and restoring missing beads and trims.


A Few Maintenance specifics

Photo by An Artsy Girl

Photo by An Artsy Girl

Buttons. Vintage buttons are their own delight, with characteristic shapes and materials associated with different eras. I like to replace missing buttons from my vintage finds with similar vintage buttons. Sometimes that means changing out an entire set if I can’t find one close enough, so it is great to have a resource for sets of vintage buttons, whether that is a shop in your town, or an online shop. There are also some pretty convincing reproduction vintage buttons to be had these days. Monkeysee.com's "Sewing on Shirt Buttons" and "Sewing on Shank Buttons" should get you started with sewing the buttons on. 

Buttonholes. Sometimes a buttonhole becomes frayed and needs repair. If you are ready to tackle this intermediate mend, you can find a very clear tutorial on craftsy.com, "How to Sew a Buttonhole by Hand."

Hems. There are three basic hem stitches, and again, it's nice to follow the style of the vintage hem you are mending. At megannielsen.com, there is a very good step-by-step tutorial for each of the hem stitches ("Hand Sewn Hems").

Photo by Hoyt Carter for the Vintage Fashion Guild Fabric Resource

Photo by Hoyt Carter for the Vintage Fashion Guild Fabric Resource

Pills. Those little fluff balls that accumulate on sweaters and fabrics with any nap are pretty easy to remove from wool, but not so easy when the pilling is on a synthetic fabric such as polyester. I keep both a pumice sweater block and sharp safety razor for de-pilling. The sweater block is great for wool and helps with synthetics, but a carefully wielded razor can get the more “sticky” pilling off. There are also fabric shavers with screens that are designed for various types of fabrics.

Pulls. For pulling a snag or snagging a pull, I use a Knit Picker. This inexpensive little gadget hooks a snag in a knit with ease, and pulls it to the inside of the fabric.

Seams. If you are sewing by hand, the sturdy and flexible backstitch is the way to go. Besides the monkeysee.com tutorial "Sewing - The Back Stitch" there's threadsmagazine.com's "How to Master the Backstitch."

Snaps, and hooks and eyes. Again, those great monkeysee.com basic sewing videos include "Sewing on Snaps" and "Sewing on Hooks and Eyes".

Sweater holes. If they are very small, you can discreetly mend a hole with matching thread, embroidery floss, or yarn. I like the tutorial over at tashamillergriffith.com ("How to Fix a Small Hole in a Knit"). 

Zippers. Because I’m deep into vintage clothing, I have a large collection of vintage metal zippers for replacing broken ones. Make sure to replace, or have a seamstress replace, a broken vintage zipper with a similar vintage model. If that's not possible (say, because you can't put your hands on a similar enough zipper), a modern zipper is acceptable. This may well not matter to you, but I'd caution you that a zipper of the wrong type can slightly lower the value of a vintage item. Also, and maybe it's just me, but I think there's a good feeling in having the right zipper, even if it's hidden. Using a sewing machine to put in a zipper is not beginning material, but using your trusty backstitch can repair a short stretch of loose stitching along a zipper. 

static1.squarespace.jpg

A metal zipper missing one tooth is not necessarily ruined. If the zipper still runs smoothly, don’t worry about that tooth, it may never need attention.

If a zipper pull is “derailed”—slipped off one side of its tracks—you can sometimes get it back on track. [see my tutorial here].

A slow or sticky metal zipper can be waxed by running a candle over the teeth (both beeswax and soap also work). A stuck vintage zipper can sometimes be budged by pushing on the teeth with a thick needle. You can also carefully dab the stuck section with a cotton swab soaked in WD-40. Once you have it going, launder out the WD-40 if possible, and then lightly wax the zipper with a candle.


When your cat and you had a fabric-ripping tussle, a moth ate your best sweater for lunch, or you stepped through the hem of your best gown, it's hard to imagine how a vintage favorite will ever be wearable again, but don't despair, many flaws can be discreetly fixed or camouflaged by a skilled seamstress, if not you. Refusing to give up on a great garment is a very vintage virtue. You've heard the expression make do and mend? It dates from WWII, when rationing and shortages were par for the course, but in our time, with limited resources and an awareness of the impact mass consumption has on the planet, doesn't making do and mending seem sensible?

If you’d like to see all my vintage care tips in one place, you might like my book Wear Vintage Now! Choose It, Care for It, Style It Your Way, available now!

Comment

2 Comments

Care of Vintage: Accessories

In case you didn't catch the beginning of this Vintage Care series, let me explain that I'm working out a section of my book. This is more or less a rough draft, and I'm very much open to corrections and suggestions, so please comment! 

I've discussed clothing care and storage, and many of the same guidelines apply to accessories, but here are some more things to consider.


Hats

Image: Houzz

Image: Houzz

Hat boxes are not only attractive but (surprise, surprise!) very useful for storing your vintage hats, although other boxes will also work fine. Usually, a bit of carefully placed acid-free tissue paper can protect hats stored together in a box, and protect the hat from a non-acid-free box over time. You can cradle delicate features such as feather plumes with tissue “nests.” If you have just a few hats or want to show off a few, and they are sufficiently sturdy, by all means do place them on shelves or wig stands. Just keep them out of direct light and give them a dusting from time to time. For dusting and cleaning hats, two interesting tools to have on hand are canned air and a soft paintbrush. You can also work with a hair dryer on its cool setting and any soft-bristled brush. A steamer can help make a warped brim pliable enough to reshape, straighten a crumpled veil, and fluff up a flattened flower. 

Veils can be particularly delicate and vulnerable, and I store veiled hats with their veils gently tucked inside, tissue separating the netting from the hat if there are any rough spots.

Many vintage hats are made of wool felt, vulnerable to insect damage, so take care to keep your hats away from critters. (See my posts on storage and insects.)


Bag Storage

Image: Apartment Therapy

Image: Apartment Therapy

Many a very respectable vintage bag has been ruined by being stacked in a pile, with the surface and structure creased, dented or even broken down. The best way to store bags is sitting upright on a shelf, and if the structure needs to be bolstered, you can stuff your bag with a clean old cotton t-shirt, a chunk of unbleached cotton, or a wad of crumpled acid-free tissue paper.

Bags are notorious for the odors they transport through the decades, from cigarette smoke to perfume. For the newcomer to vintage, I absolutely recommend choosing a bag with no odors. Stuffing the bag with tissue which is periodically replaced can help remove mild odors. I have used dryer sheets in bags with stronger odors, but of course, one ends up with the dryer sheet's perfume-y odor that will linger.


Shoe Storage

Image: Apartment Therapy

Image: Apartment Therapy

For short-term storage (about 18 months), a shoe rack or placement on a shelf is just fine, but for longer storage it's best to box them and use acid-free tissue to stuff the shoes to support their shape. Take care not to overstuff or you can stretch the shoes. Wrap the shoes individually in more tissue or plain cotton and set them in a box. Moisture can promote mildew, so use a breathable cardboard box, preferably acid-free for your most cherished shoes. You can find acid-free photo boxes in just the right size for a pair of shoes.


Bag and Shoe Care

Leather can and should be cleaned and conditioned. I like Cadillac Leather Lotion, which helps to preserve leather, reptile skins, and also imitation leather surfaces. You can use it on your shoes, bags, and even jackets. There are many other products that work similarly, such as saddle soap.

Suede can be brushed with a suede brush or rough towel. Suede is not as sturdy as smooth leather, and it will easily absorb dirt, moisture, and oils. If you have a small, dry stain to remove from suede, you can start by softly scrubbing it with a cloth or art gum eraser. Be gentle and don't dig a hole in the suede's nap, but do loosen the stain, and raise the nap that might have gotten stuck down with the stain. 

You can use a vacuum to help clean out your bags and shoes, and to remove some of the dust from the exterior of any sturdy fabric bags and shoes without beading or other potentially loose embellishments. For those, you can use a screen over the head of your vacuum wand, or use a soft brush to loosen and sweep away dirt. 

Patent leather (real or faux) can be cared for with some common household products. You can wash off the surface with a damp cloth. A glass cleaner can be used to remove dirt and improve the shine. Use a soft cloth with petroleum jelly or mineral oil to rub out scuffs and then use your cloth to polish the remainder of the shoe or purse. Use a clean cloth to buff to a shine. If you have a stubborn scuff or fogging, first try rubbing it with isopropyl alcohol on a cotton swab. If that doesn't do the trick, using a low percentage acetone (the kind used for fingernail polish remover) with a cotton swab may work. Follow up with mineral oil or petroleum jelly to restore the gloss. With the acetone you'll removing some of the protective lacquer, so use it with caution.

If your shoe's insoles have lifted around the edges, I would recommend using a shoe glue such as Shoe Goo or Barge Cement. A paintbrush can help apply the glue. If the insole seems to be coming loose, you might want to carefully lift it off and reglue it entirely. 

Just like finding a good dry cleaner and seamstress, it is a very good idea to find a good shoe repair shop, one that respects vintage workmanship. 


Scarves

If you've got 'em, flaunt 'em (vintage scarves, that is!)

If you've got 'em, flaunt 'em (vintage scarves, that is!)

Collecting scarves can be addictive, and if you have considerably more than can be reasonably stacked in a drawer, consider a hanging set of loops. You can use any kind of plastic ring so long as they don’t have any rough spots. The added advantage of this hanging method is being able to see them all better.

You can almost always hand wash a scarf, even one made of silk, using cool to tepid water and very mild soap or baby shampoo. You may see some dye bleed, but just don't leave the scarf to soak long (or wash more than one at a time) and you will be fine. If you have stains to remove, you can try using the mild soap on the spot as a pre-treatment, first checking on a tiny bit of an edge of the scarf to make sure the color doesn't fade noticeably with the full-strength soap. Don't wring or twist, but roll the washed and rinsed scarf in a clean towel before laying it flat to dry. You can then iron it using a press cloth and a low heat setting just as it reaches a nearly dry stage. Avoid ironing on a rolled (hand-sewn) hem. If a silk scarf has lost its gloss, you can sometimes bring some of that back by rinsing it in a solution of white vinegar and water (1/4 cup per gallon).


Gloves

Image: Livin Vintage

Image: Livin Vintage

In our mother's and grandmother's days, gloves were often stored in pretty, decorative long boxes. I have so many gloves that I keep them in boxes by color, with one small drawer devoted to long white gloves, and one to short white gloves.

The vintage way of washing your gloves is to leave them on and make like you are washing your hands, using a gentle soap and lukewarm water. You can use a soft brush for spots. Invert the gloves and repeat the hand washing, then rinse them thoroughly. Allow the gloves to dry away from heat. Keep the colorful gloves away from their white and cream mates to avoid dye bleed.

If you have unlined leather gloves that are clearly stamped "washable" inside, you should be able to wash them by hand successfully using the same technique, but with a couple of additional steps. Roll your washed gloves in a towel from the fingertips to the cuffs, allowing water to drain out the cuffs. When the gloves are nearly dry, put them on, allowing them to shape again to your hands. If you have let them get all the way dry, moistening your hands before pulling them on will help to get the shape back. If the gloves are not clearly marked washable, they haven't been tanned to allow washing and would need to be dry cleaned. Dry cleaning washable leather gloves negates the option of washing them. Any dry cleaned or non-washable leather gloves will shrink badly if washed.

After all, you want them to fit like a glove—not smaller!


Next time: Basic mending


If you’d like to see all my vintage care tips in one place, you might like my book Wear Vintage Now! Choose It, Care for It, Style It Your Way, available now!

Some of the links in my blog posts may be Amazon affiliate links, which can help me maintain my website. I only link to items I truly recommend for you, and would personally use.

2 Comments

8 Comments

Care of Vintage: Vintage clothing-munching insects and how to keep them at bay

Insects. I know, ewww, right?

But did you know that clothes moths (and other fabric munchers) serve a useful purpose? In their natural (outdoor) setting, they are scavengers, breaking down feathers, fur, skin, and other cast-off organic ingredients that then become part of the soil. That’s right, the little varmints don’t specifically want to eat your best cashmere sweater, but if stuck inside, they will make do with it. 
 

OK, enough of the niceties, let's get down to business.

Scary stuff! Image found here.

Scary stuff! Image found here.

Many of our foremothers' vintage ways are well worth reviving, but one that is not is the use of dangerous pesticides to kill fabric-eating pests. You can really sense how desperate one can get from the packaging of the products used! 


A little bit about the major fabric-eating insects: 

1. Carpet beetles are very small (1/8"- 3/16") flying insects. There are a number of species of carpet beetles, each with different but similar markings. The adult carpet beetle is not harmful to fabric, but its larvae will eat fur, hair, feathers, silk, wool, mohair, cashmere, or any other hair fiber. This is the only insect I have experience trying to control. I found that the adults love light and white surfaces and can be spotted on windowsills and light fixtures. The dark-preferring larvae are like tiny (1/4" long) caterpillars. They are hairy and yellowish to gold to black-brown depending upon the species. The larvae of course do not fly, but hatch from eggs and get to work on eating your clothing.

2. Clothes moths are of two types: Webbing clothes moths, which are the most common in the U.S., and case-bearing clothes moths. Both species produce very short-lived adults, the webbing type is gold/buff in color and has a wing span of about 1/2";  the case-bearing is even smaller. They are at home in dark places and perfectly content to live in your closet. Again, it's the larvae that do the damage, and these love to eat the same things as the carpet beetle: Woolens, hair, fur, hair fibers, silk, and feathers. The up to 1/2" long tiny worm-like larvae of the webbing moth is distinct from the case-bearing moth's larvae, which forms a silken mantle which can be white, or colored with the tints of what it is eating, making them harder to see. Soiling of your stored clothing is what attracts the moth; vitamin B from sources such as sweat and body oil serves as food for the earliest stage of the larvae, without which it can't survive.

3. Silverfish and firebrats are nocturnal, wingless insects that thrive in moist, warm environments. Silverfish like temperatures in the 70s and 80s, while the firebrat likes 90º+ degrees, such as you might find in an attic. The 1/4"- to 1/2"-long adults eat a wide-ranging menu—especially orienting to anything with protein, sugar, and starch—including book bindings and paper, wall paper (for the paste), carpet, clothing, coffee, hair, some paints, photos, plaster, glue, and sugar. They will eat any starched fabric such as cotton and linen, along with wool, rayon, silk, fur, feathers, and even leather.


How scary can you get? Image found here.

How scary can you get? Image found here.

With the thought of your vintage cashmere coat's nap being mowed down by one of these pests, and the prospect of sprinkling poisons around to kill the pests, I think we can agree that an ounce of prevention is worth a ton of cure. 


I am very fortunate to live in a dry environment with hard freezes during the winters. Insect infestations are not the problem that they can be elsewhere. For those not so lucky, it may be necessary to always thoroughly clean or freeze or heat vintage finds. Launder any new-to-you sturdy, washable vintage item, or have it dry cleaned if that is what is best for the item. 

Keep your home and especially your clothing storage area clean and dry. Vacuum the nooks and crannies. Fabric-eating insects are attracted by animal hair, sweat, body oils, and food. Don't store clothes that need cleaning because those are invitations to pests. Avoid using starch on your clothing, which also attracts insects. Keep a vigilant eye on your stored items to make sure no new infestation has started. Don't forget your handbags and shoes can attract these critters as well, and should be kept as clean as possible. Some insects (crickets, cockroaches, termites) are attracted to food and other stains on your clothing, and although they don't eat the fabric, they can cut through it while eating their meal. There are so many excellent reason to keep your clothes clean—this just might be the most compelling! 

Use is a perfect deterrent for insect pests. As long as you keep wearing your clothing it is not going to be possible for an infestation to take hold. Of course, you can't wear that mohair sweater in the middle of summer—most of us have to find a safe way to store our clothes.

Dry cleaning kills pests and removes stains that attract them. Washing to remove stains on a garment will make the clothing uninteresting to pests. Keeping  your vintage finery clean is your first line of defense.

Freezing is used to kill insect pests, but it will only work if your home freezer goes down to -20ºF (and you have space in it!). Freezing under these very cold conditions will work well to kill adults, larvae, and eggs of insects. To freeze an item, seal it in a plastic bag and give it three days in your freezer. When you take it out, be careful; in a frozen state the item will be more brittle. Let your item rest in its bag for another 24 hours, allowing it to acclimate again to room temperature. Allow any condensation to evaporate before you store your garment again. If you get your timing right, and if you live where the temperature dips low enough, you might be able to put a batch of clothing outside during a deep freeze.

I have read about lavender being an insect deterrent. Apparently, as lovely as its scent is to us, it may discourage adult fabric-eating insects. I'd say go ahead and use it so your closet and drawers smell good, but don't expect it to kill anything, or stop the larvae from feeding on your items. 

According to MuseumPests.net, cedar does not work as an insect repellant. Although cedar oil can kill the earliest stage of clothes moth larvae, it does not kill the eggs, the adult moths, or other pests. If your great aunt had good experiences with keeping her sweaters in a cedar chest, it might just have been the sealed-off conditions that helped the most. Storage is best achieved in a plastic bin with a tightly fitting lid. Your clean clothing should be wrapped in plain cotton to help absorb moisture in the bin. As I wrote before in the post about storage, plastic is not good for fabric over the long haul, but storage for several months is fine, like the several months during which you wouldn't use your sweaters over the summer. 

Heat may also be used to kill insects in all life stages. Using an oven's warm setting, which is usually 140ºF (do not use higher heat), place your clothing item on a clean, oven-proof tray or sheet pan on a rack with a pan of water on a lower rack. After three hours of "cooking," turn the oven off, removing the item when it has cooled down. Carefully controlled heat is even being used by exterminators for safely killing pest infestations in entire hotels. It truly does work. 

There are readily available non-toxic pheromone traps that attract adult males of specific insect species. These work to help you identify the critter involved in an infestation, and eventually break the cycle of damage, but they do not help isolate the larvae that do the damage in the first place. If you are really stuck with a terrible infestation after doing all you can to keep your vintage safe, I would recommend hiring a professional exterminator. 

Really, really scary. Image found here.

Really, really scary. Image found here.

One last thing. I have come to appreciate the help of spiders (as long as there aren't TOO many) in my house. They eat these pesky fabric-munching insects with relish, and probably are much more capable of finding some of the hiding places in your floorboards and carpets than you are. 

OK, one LAST last thing: If there was such a vote, I'd be chosen Least Likely to Vacuum Every Nook and Cranny. I'm not incredibly fastidious, but I'm very fortunate to live where insects just aren't the problem that they are in other regions. The one time I found my absolute favorite cashmere sweater riddled with holes, I learned just how much others suffer with insect damage. I had to run and look up everything about controlling carpet beetles. It's not a pleasant subject, but it is one about which to have some knowledge if you want to protect the clothing that you not only invested in, but love. 
 

This is the most recent in the series on vintage care I'm writing in preparation for publishing a book. Your comments on these posts really help me in getting my act together! 


Next time: Care of Vintage Accessories

If you’d like to see all my vintage care tips in one place, you might like my book Wear Vintage Now! Choose It, Care for It, Style It Your Way, available now!

8 Comments

2 Comments

Denisebrain is 19!

April 22nd is the day: denisebrain's 19th anniversary! Nineteen years of finding, mending, cleaning, writing about, photographing, discussing, selling, and loving vintage fashion. Nineteen years of being positive I have the best job in the world. 
 

Now and through the weekend, please help me celebrate by taking 19% off your purchase from my Etsy shop using the coupon code 19THANNIVERSARY, or just click on this link: https://www.etsy.com/shop/denisebrain?coupon=19THANNIVERSARY and the discount will be taken automatically when you check out. The code is good today through the weekend.

I get to be Queen for a Day!

I get to be Queen for a Day!

You may have noticed that April 22nd is also Earth Day, and although that was coincidental, founding denisebrain on the same day was a meaningful coincidence. One of my favorite things about this job is knowing that I am making a small difference by recycling well-made and beautiful clothing and accessories.


(Maybe not so small, that difference—in these 19 years I've sold over 10,000 vintage items! If one of those items went to you, thank you so much!)

2 Comments

4 Comments

Care of Vintage: Storing Vintage Clothing

In my series on caring for vintage, we've come to vintage clothing storage. I am going to write about accessories care and storage in upcoming posts, but this is specifically for the clothes. In case you missed the beginning of this series, I'm working on a section of my upcoming book by testing it out here in my blog. I have gotten some wonderful suggestions, so please don't hesitate to comment if you think there's something missing!


Two giant don’t’s in a book with few don’t’s: Plastic bags and wire hangers.

Wire hangers can be recycled, but not used for your vintage clothing. Remember Faye Dunaway as Joan Crawford in Mommie Dearest?

NO... WIRE... HANGERS. What's wire hangers doing in this closet when I told you no wire hangers EVER!?

Those wire hangers can go back to most dry cleaners for reuse, but do NOT store your clothes hanging on them. They can stretch and tear your garments’ shoulders, the hooks can catch on clothes, and eventually they will even leave rust stains. 

I don't want to have to tell you again. :)

Wood hangers are handsome, but I can’t recommend them for your vintage clothes because wood (and some of the stains and finishes used on wooden hangers) can react with and damage fabric.

Padded hangers are friendliest to vintage clothing that can be hung, with the weight of the garment distributed over the shoulders. The padding will also help enforce some space in your closet, so that wrinkles don’t develop, and fabrics have a bit of room to breathe. Padded hangers can be made over plastic hangers, using batting wrapped with plain cotton muslin.

Many a vintage gown has a pair of inner ribbons to loop over the center of the hanger to take pressure off the shoulders and straps from the weight of the dress, and to prevent the dress from slipping off the hanger. Use these.

I find that typical skirt and pants hangers, the kinds with those pinching clips, can put permanent dents in fabric, so I turn the garment inside out to clip the reverse side, and often also distribute the pressure of the clip with padding. Some skirts and pants have inner loops for hanging, much like dresses.

Some things are best not hung at all. Have you ever put on a mini-length knit dress only to find it had become a midi? Welcome to the world of gravity! When you go to store your knits, it is best to fold or roll them and set them on shelves. 

Not that this is beginner’s stuff, but if you have a heavy and delicate, fragile, or very vintage garment (such as a beaded silk dress from the 1920s) do not hang it at all, but let it rest flat, or softly roll it padded with acid-free tissue paper. For that type of precious garment you will also want to invest in acid-free boxes for storage. 


Jean Muir garments stored on padded hangers, with Tyvek storage covers. Photo courtesy of National Museums Scotland

Jean Muir garments stored on padded hangers, with Tyvek storage covers. Photo courtesy of National Museums Scotland

{Cue the Joan Crawford voice again} Do not store in dry cleaning bags or garment bags made of plastic or vinyl. Plastic doesn’t breathe and can trap moisture that nurtures mold and mildew. Over time, plastic can react with fabric and break down. I have seen and felt plastic garment bags that literally adhered to vintage clothes stored inside them. Cotton muslin garment bags (or even just covering the clothes with old cotton sheets) can help keep stored vintage clothing clean and protected against potential damage from closet mates. Tyvek® is also a possibility, and is used to make garment bags. It is pH neutral, acid free, and tear resistant. It keeps water out while allowing moisture vapor to escape.
 

Do not store any clothing (vintage or new) in sunlight for any length of time. I have seen a printed cotton robe fade within several days of being near a window, so it sometimes doesn’t take long. You might actually have a window in your closet, and this will need to be curtained or shaded. Other times you might hang a gorgeous vintage kimono or evening gown up for display on a wall, but be careful that sunlight doesn’t hit that wall. I’m fortunate that my outdoor laundry line runs through both shade and sun—I use the sunlight for fading and bleaching. Incandescent light, although much less so than UV light, can fade fabric over time. Fluorescent, compact fluorescent, and LED lights are much less harmful to fabric. 

Avoid storing clothing in extreme temperatures and/or humidity. Moisture is particularly damaging to fabric. The rule is that your vintage clothing is going to be comfortable if you are, kept at 65-75 degrees Fahrenheit and about 40-50% humidity. Dehumidifiers come in everything from inexpensive disposable moisture-absorbing pellets to rather costly (but effective and long-lasting) appliances. Basements and attics can have drastic temperature swings that damage fabric, and basements in particular can be damp. Which reminds me: Avoid mildew (and even possibly dye transfer) by hanging clothing in a closet only when it is completely dry after washing. 

Various climates pose various challenges. You can have a bone-dry, dusty environment in the desert, or a hot and humid environment in the lower latitudes. Air conditioning, the same kind that would make you comfortable, would make your clothes happy too. 

Hang up your vintage clothing even if it needs cleaning, and don't wait long to clean. If you have any obvious stains, the sooner you try to get them out, the better, and many stains show only over time. It's a good practice to keep your vintage and its surrounding area clean so there's less chance of attracting fabric-eating pests. (Those pests are coming right up...)


Next time: Harmful Insects
 

If you’d like to see all my vintage care tips in one place, you might like my book Wear Vintage Now! Choose It, Care for It, Style It Your Way, available now!

4 Comments

2 Comments

Care of Vintage: Wrinkle Removal Tips

In case you missed the beginning, I've been writing a series on caring for vintage, including washing, stain and odor removal. This time it's about getting out the wrinkles.

The vintage care advice I've been posting is coming soon to my book, so I'd love your feedback if you think I've forgotten something.


Let it all hang out

Start by hanging up your freshly washed clothing to avoid as many wrinkles as possible. Stuck on repeat: Never use wire hangers. They put a lot of strain on the shoulders of your garment and can even rip through delicate fabric, especially when it is wet. Then there is the potential rust… Knits and more delicate items are best dried flat to prevent stretching and other damage.


Press on

Woman ironing a starched petticoat, about 1901. Photo by N. M. Hinshelwood/McCord Museum via Wikimedia Commons

For vintage woven cottons and linens, an iron is going to create the crispest detail and smoothest finish. Your iron will have heat settings for various types of fabric, but don’t just set and go. Always start a little below the temperature you think you might need and see if it is sufficient. Do a little test on the inside of your fabric in an inconspicuous spot and make sure you aren’t seeing any press shine or melting. As a matter of fact, you might be better off doing all your ironing on the reverse of the vintage garment to protect the surface from any shine. I recommend using a press cloth for most of your iron-able pieces. Some people have an entire wardrobe of different fabric press cloths for protecting various materials while they iron; a basic press cloth is usually a piece of washed cotton muslin.

Things to never iron: Velvet, leather, vinyl, fur, faux fur, buttons, sequins, braid and other trims, the surface of iron-on transfers, embroidery, feathers. If the fabric is embossed or crepe-textured, you will flatten its texture with an iron. Go easy on seams, because the heat of the iron combined with the pressure over a seam can create press shine even if most of the fabric is tolerating the heat well.


Full steam ahead

I love my steamer. It is truly the number one most important vintage fashion-care investment I have ever made, and I get sad when I think about the years I spent without one. I do believe I would marry my steamer if it asked me.

OK, so I exaggerate…but not excessively. I have found that a steamer is the best thing for all wool and rayon items that you need to de-wrinkle at home. It doesn't cause any shine, and it fluffs up wool—in fact, it makes wool a bit springier and more lively. Instead of flattening fibers like an iron, steamers relax fibers.

A typical steamer consists of some sort of refillable water vessel that is heated to boiling, a hose that directs steam from the boiling water, and a wand for running over (or under) your garment’s surface.

It is usable on almost any fabric, and has only hurt one thing in my experience: Vinyl. I had a coat with faux leather trim, and the outer layer of the faux stuff literally peeled off in the steam. It probably wasn't going to make it anyway, but that did it in. Otherwise, it has a perfect record: No scorching, no press shine, no shrinkage, no melting.

As to how to use the steamer, start by letting it get thoroughly going. Some models tend to drip on the fabric if they are not warmed up and steaming like mad. Hang your garment near the steamer; some steamers even have racks for hanging your clothes. You can either steam on the surface or reach up and inside the garment, letting the weight of the garment help hold the fabric taut. You sweep the wand over the fabric, holding the wand right against the fabric. If you want to steam something like flowers on a hat, you can experiment with shaping it in the steam from the wand. You can also shape a hat veil, brim, or crown.

Jiffy steamers even come in pink!

Jiffy steamers even come in pink!

You can find hand-held travel steamers, but for regular home use, I would recommend a compact, personal model such as those made by Jiffy Steamer, the company that invented this most useful household appliance in 1940.

One caution: Until you get the hang of using a steamer, it’s quite easy to get a steam burn, or, depending upon the steamer, a burn from the wand or hose. You might want to test (quickly touch) to see which parts of the steamer get hot. Definitely steaming inside a garment is more likely to get you a steam burn than steaming on the outside. It takes a little practice to get used to, just as does an iron.


Next time: Storing Vintage


If you’d like to see all my vintage care tips in one place, you might like my book Wear Vintage Now! Choose It, Care for It, Style It Your Way, available now!


Jiffy Steamer

Here’s my dream steamer!

This has an Amazon affiliate link which can help me keep my business going. Rest assured that I only link to items I truly recommend for you, and would personally use.

2 Comments

Comment

Care of Vintage: Odor Removal Tips

oops!bf (1).jpg

Welcome to the latest installment in my series on caring for vintage, this time it's the ever-so glamorous topic of bad odors. 

Sweat odors from way back, musty basements, great-aunt Martha's mothballs, and the fact that just about everyone smoked, all contribute to the smells you sometimes find in vintage.

The vintage care advice I've been posting is coming soon to my book, so I'd love your feedback if you agree, disagree, or have further recommendations. The care section of this book is the hardest for me, and I'm always learning new things...including from you!

In my experience, almost all odors can be removed from vintage clothing except sweat odor on older (pre-1950s) vintage. It can take a very long time to remove the smells of mothballs, cigarette smoke, and mustiness, but these may be removable, with patience.

Again the caveat for my book about getting started with vintage: Don’t begin your vintage-wearing career with something that has problems, including odors. Bad smells are often harder to put up with than holes or stains.

Sometimes you will end up with a vintage piece that develops an odor, even though it came to you fine. I know I have worked to eliminate odors that snuck back after some weeks of freshening up. Other times you’ve brought the odors on yourself (Friends who smoke? Puppy not house-trained?).

It's always good to start with the easiest, cheapest solution if you can: Air and sunlight freshen clothing, and sometimes a good airing out is all a mild odor needs to disappear. Of course, if you can wash the garment, that may be all that's needed. 

For most odors (sweat, mildew, smoke, mothballs, someone else's perfume), my number one favorite product is Zero Odor spray. I have even been able to remove 1950s-era and newer vintage sweat odors with this product, and while it starts with a mild tracer scent, it doesn’t leave any lingering perfume-y odors behind. The makers are—I assume purposefully—vague about how their product works (it “seeks out and bonds with odor molecules”) so I can’t say what other products might work similarly.* I’ve not found anything else like it. Before you try Zero Odor on any garment, test a little in an inconspicuous place to be sure it doesn’t cause dye bleed or water staining on your fabric. The same goes for any liquid stain or odor remover. Fabrics will react differently and it’s much better to be safe than sorry.


Other odor eaters
 

Many swear by using a spritz of undiluted white vinegar or vodka. Both can kill the bacteria that causes sweat odors, and also mold spores. Vodka (for this grab the cheapest and highest proof) is often recommended over vinegar because it really has no odor after a very short time, as well as evaporating rapidly. Make sure you use this technique only on items that are colorfast and can accept a little moisture. My own experience with vodka is that it is quite effective for new-ish sweat odors, but even multiple sprayings haven't produced results for me on older sweat odors.

Closing your offending item in a bag or box with an odor absorber can sometimes work for mothball smells. You can use activated charcoal, kitty litter that contains charcoal, baking soda, or even coffee beans. What I've done is sprinkle some of the odor absorber in the bottom of a garment bag with the garment. One of my experiments produced results on a strong mothball odor over the course of about three months, so patience may be needed.

For smoke from cigarettes or fires, I have successfully had batches of clothing deodorized with ozone treatment, available at some dry cleaners. It takes between a few hours and a few days, but it does oxidize and destroy smoke odor. I have even had this work on a collection of Victorian and Edwardian clothing and accessories that had been in a house of chain smokers for decades. 
 

I hope this helps, and that your vintage always smells daisy fresh!

vintage_girl_in_daisy_meadow_by_hauntingvisionsstock.jpg

*Although there is a very helpful review of Zero Odor on Amazon.com (here), in which the reviewer explains what he has been able to figure out about its ingredients and how it works.
 

Next time: Wrinkle Removal Tips


If you’d like to see all my vintage care tips in one place, you might like my book Wear Vintage Now! Choose It, Care for It, Style It Your Way, available now!


Here’s my favorite odor remover, mentioned in this post. This item contains an Amazon affiliate link, which can help me keep my business going. Please be assured that I only link to items I truly recommend for you, and would personally use.

Comment

44 Comments

Care of Vintage: Stain Removal Tips


In case you didn't catch the start of this series, I'm sharing a draft of one section of my upcoming book, piece-by-piece, in my blog. I'm hoping to encourage myself to fill in the gaps as I go, polish the rough edges, and—especially—get your feedback on what I've written.

This section of my book is about taking care of vintage, and even though I am constantly taking care of vintage clothing and accessories (and have for decades) I still learn new things all the time. As a matter of fact, the Virgo in me has been going back and checking details on this subject forever. I'm sure I will be continuing to research stain removal well up to publication, and beyond. Go ahead and surprise me with the world's best stain remover, or let me know if you've tried unsuccessfully with one of the methods I describe. I'd love your thoughts. 
 

wine-stain-2b.png

Old stains are usually not very easy to budge. (Have I said it before? About starting out with vintage in excellent condition? I thought so.) 

That said, here is what I can at least conditionally recommend for common stains in washable vintage clothing. In my previous posts in this series, I covered the essentials of fabric identification, and washing/cleaning basics. Those are the first steps, stains are the next step. If you are anything like me, you need to have a few stain removal tricks up your sleeve (perhaps for the spots on your sleeve!).

If you have a fresh stain, treat it as quickly as possible. Lift off any of the stain from the surface of the fabric (say with a spoon or butter knife), then blot the stain with a dry cloth. Do not use an iron or a hot dryer on a stain, as you are likely to heat-set the stain and make it difficult or impossible to remove. 
 

Bleach
Prevention: Bleached spots obviously cannot be reversed, so be very careful to contain any splashes and spills. With chlorine bleach, it’s ALL about prevention. Yes, bleach can be used to remove spots on certain fabrics (mainly sturdy white 100% cotton), but it must be used with caution around almost any other fabric. That said, as a last resort, a permanent marker of the closest possible color might be used to fill in a tiny light spot.
 

Blood and other protein stains
Prevention: Obviously, blood is not the sort of thing you can often prevent. It’s easiest to remove a blood stain when it’s still fresh—before it gets a chance to dry. As soon as you can, hold the stain under cold running water, which can sometimes get most of a fresh stain out.

The next step with any sufficiently sturdy washable item is to soak the garment in cold water with an enzyme product, which can be a detergent with enzymes, an oxygen bleach with enzymes, or a pre-treatment product. The enzyme protease (found in these products) is very effective at getting out protein stains. Hydrogen peroxide, in the 3% solution that you can find at any drug store, or as the key ingredient in oxygen bleach, is an excellent blood stain remover as well, even working on dried, older stains. Although not usually a problem with any sturdy, washable, and wearable vintage item, delicate washable pieces probably should not be soaked with an enzyme product or hydrogen peroxide. Do your dye-bleed test first. If you have any doubts, take the item to your (trusted) dry cleaner.

While blood and other protein stains (egg, dairy products, sweat, and urine are also in this category) are relatively easy to remove, they will be permanent if exposed to heat. Don’t expose a protein stain to warm water, iron, or dryer or you will set the stain in. In vintage fabric, you will find heat-set blood stains, and sadly, they are most likely there to stay.  
 

Dye bleed
Prevention: As I described in the previous post, check for the possibility of dye bleed before plunging anything into your wash water. Using cold or cool water and hand washing individual items separately are both helpful in preventing fabric dyes running. Color catchers are sheets that are manufactured to attract and form a chemical bond with loose dyes in water while washing. I have found these useful (but not flawless) for machine washing, and even for hand washing. 

Once a dye has bled, try using either RIT Dye Fixative (be careful not to confuse the fixative with dye remover), or a detergent such as Synthrapol. Both these products are designed to bind to loose dyes and remove them from the fabric.  
 

Ink
Prevention: Cap your pens before putting them in your bag or pocket; be sure to check pockets before washing.

Water-based ink stains can be soaked out with liquid laundry detergent. Ballpoint and felt tip pen marks sometimes respond to isopropyl alcohol alone, which you can apply to the stain with a cotton swab. For me, Carbona’s ink remover (Stain Devils #3) is a good purchase, even working to remove old ink marks in leather purses. Amodex Ink & Stain Remover is also frequently recommended. Remember that any liquid spot remover is likely to leave a ring unless you are able to wash the item after treating it.


Liquid ring marks (water, and liquid spot removers)
Prevention: The most frustrating of stains is the one you create while trying to remove a stain. If you are going to use a liquid spot remover, and can not wash the piece afterward, you may well end up with a liquid ring spot around your original stain. Use a liquid spot remover on a textured wool suit or coat between dry cleanings, but go very gingerly (and test on an inconspicuous area first!) before using one on anything else. 

Water rings can sometimes be lessened by rewetting the stained area with a damp cloth. Moisten the area enough to obscure the ring. Then use a dry cloth, a blow dryer, or an iron (on the setting appropriate for the fabric) on the edges of the dampened area first. What you are doing is dissipating the edge of the ring, then quickly drying the area so that there is not a new ring. I have been able to use this technique even on dry clean only items. Unfortunately, a liquid ring can sometimes be caused by something like rusty water, leaving a rust stain. 
 

Makeup
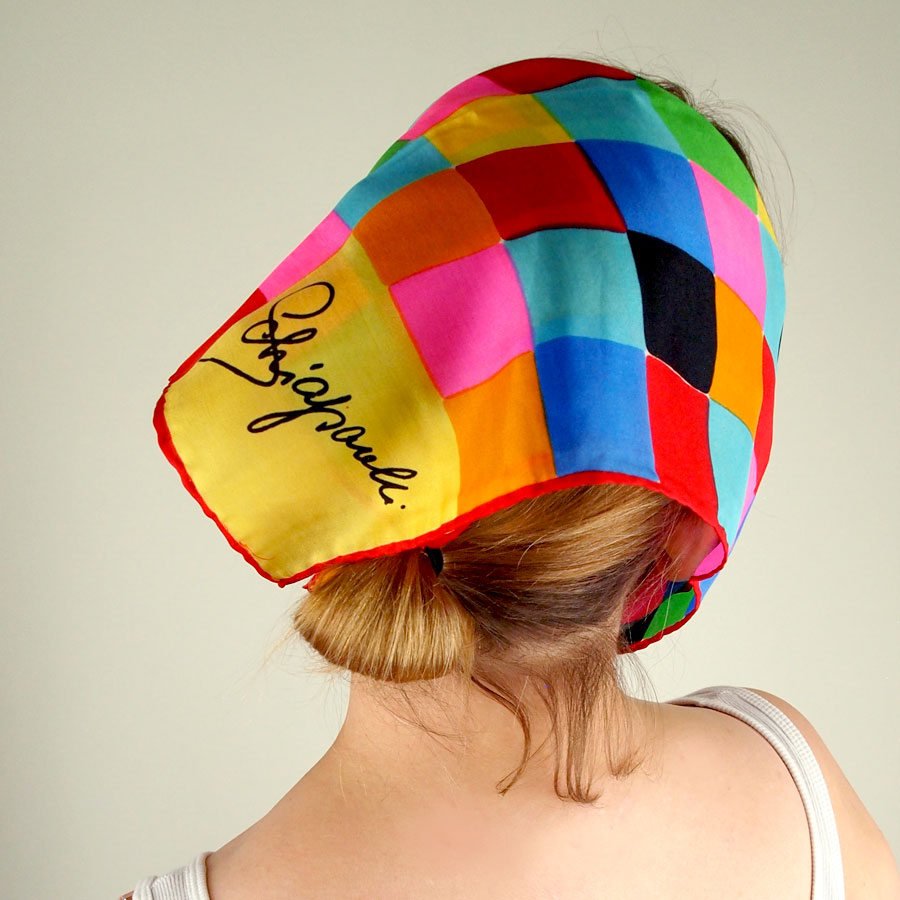
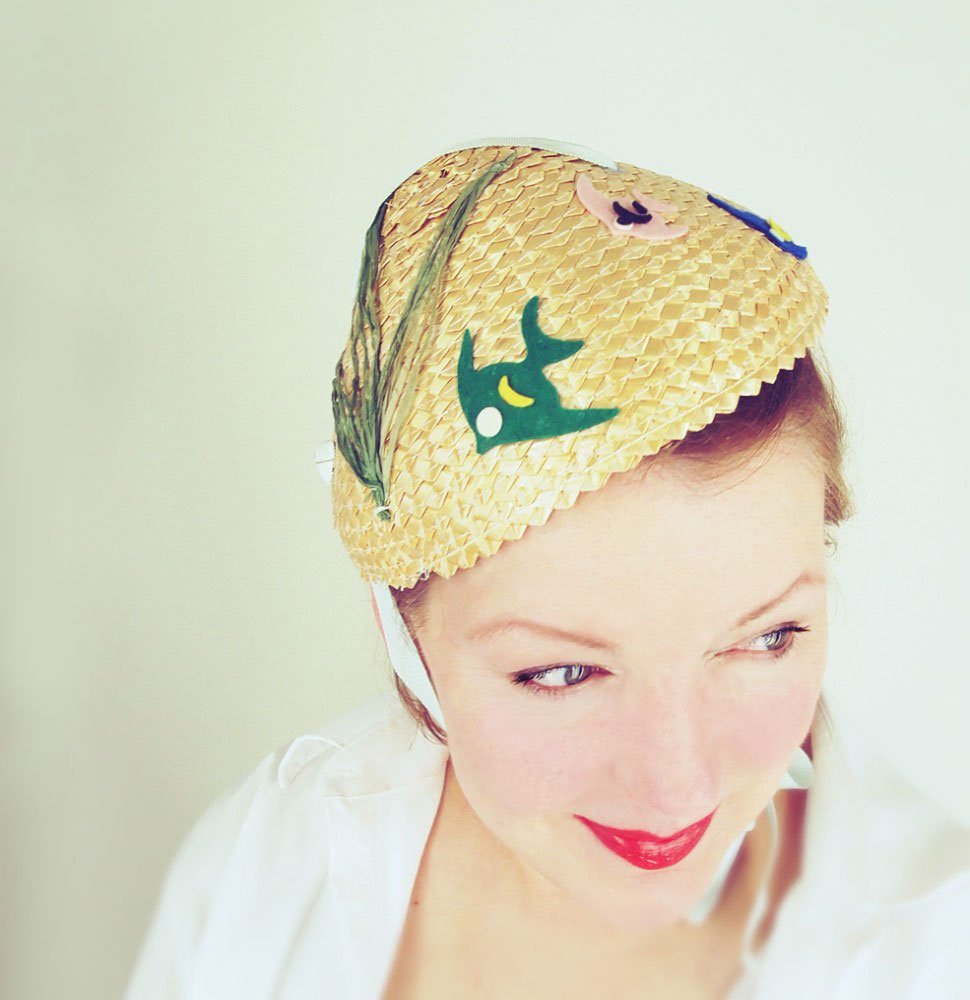
Prevention: Roll your lipsticked lips in when pulling clothing over your head. Foundation, powder…all these tend to grab onto your neckline. If you have makeup on, take care to keep any fabric from touching your face. This takes a little practice but saves a lot of hassle. Another solution is a protector hood, which goes over your head (and don't worry, it's open mesh and still allows you to breathe!). This keeps your hair and makeup from getting mussed, as well as protecting your clothing. You can find these as unused vintage models as well as new. 

For new stains, if there is any of the product you can remove from your garment, do so first. Some powder makeup formulas can be at least partly removed with a lint roller, while the liquids, gels, and cream-type formulas can sometimes be scraped off. Try not to push the stain into the fabric. The two most common makeup stains one tends to see are those left by lipstick and those by foundation. Both usually contain an oil or wax component, and a color component. The oil/wax can be removable from a washable fabric with an enzyme stain pre-treatment or a pre-soak with detergent containing enzymes. Let the stain remover work for about 15 minutes, then wash the garment in the warmest water that is safe for it. The washing should help take out the color in the stain. I have had success removing older makeup stains with the same methods, although it usually takes more soaking, or repeated treatments.

This said, Fire Engine Red lipstick (so vintage chic!) can be difficult to remove. For such a pigmented stain, try applying a few drops of ammonia or vinegar with detergent in water, tamping it into the fabric with a spoon (the spoon coaxes the solution in gently), then blotting and flushing the stain. You can also try sponging the stain with alcohol. A few drops of acetone (tamped, blotted, and flushed) can work to remove that red, but you must be sure you are not applying acetone to acetate as it will dissolve the fabric! 


Mold and mildew
Prevention: Store clothes out of damp places. If your environment is always humid, keep a dehumidifier (more about this in a future post about storing vintage) closed in a space with your vintage clothing. Allow some breathing room between garments for air to circulate. Often mold and mildew damage in vintage clothing takes the form of tiny holes or staining from the former presence of the mold, even if it is no longer living. Be vigilant against any new mold, as it can do a lot of damage.

Especially if you are allergic or have significant amounts of mold and mildew to remove, take the clothing outside and brush off as much as you can. Living mold spores can continue to grow, so it's best to let them do so outside of your home! If you have living mold and mildew in washable clothing, you have several options for its removal:

  • One-half cup of borax which has been completely dissolved in hot water can be poured into your wash water to kill mold effectively.

  • Vinegar is another choice, killing most of the mold species that are likely to be found on clothes. You can soak clothing with half water/half vinegar, then rinse out the vinegar and wash the garment, or you can use vinegar in your wash water. Vinegar can leave its own odor behind (although it certainly beats the moldy smell it helps remove!), so thoroughly wash and rinse.

  • Use 1 cup of hydrogen peroxide 3%, and 1 teaspoon of oxygen-based bleach to sponge the mold and mildew before thoroughly rinsing and washing.

  • You can use chlorine bleach to kill the mold and remove its staining, but only on sturdy white cotton fabric.

Dry cleaning will kill mold, but in the case of vintage mold stains, this is certainly not guaranteed. The mold very slowly eats away at fabric, so you may end up with tiny holes even if you can get the mold spores and stains completely out. One of my next posts will be devoted to the subject of odor removal, where mold and mildew once again are problematic.
 

Mystery stains
If you didn’t cause a stain, you can sometimes sleuth out the source of the spot by where it is located and/or its color. Food stains are usually on the front or seat of a garment, perspiration is around the neckline, upper back, and underarms. Grease is often at car door levels, mud on the hem of a long skirt or trouser cuff, bleach spots tend to be around waist level. Rust stains might be inside the shoulders from metal hangers, around steel fasteners, and around covered buttons with the metal rusting through.

Brown stains are usually protein-based, gray stains are often in the oil or grease family. Rust-colored stains can be rust, but also, tea, coffee, or certain cosmetics.

If you still don’t know what sort of stain you have, start by soaking any washable garment in cold water for 30 minutes to see if the stain lightens. 

Next try working in a prewash stain remover and letting it sit for 15 minutes, then soaking with detergent and water.

If you haven’t made any headway, try oxygen bleach and tepid water. Allow the garment to soak for at least four hours, or overnight. I have left stains to soak for as many as four days (changing out the oxygen bleach and water every half day or so), seeing that the stains were improving slowly with time. 
 

Oil and grease
Prevention: Oil-based stains range from ointments to cooking oil to gasoline. Sometimes these are hard to see in fabric and can be set in with heat drying or ironing, so make sure you look any clothing over carefully before you wash it. Oil is particularly stubborn in polyester. Try to avoid deep-frying while wearing your favorite 60s mod polyester tunic top! 

Wash out any new oil stains in warm water with dishwashing liquid (which is designed to pull out grease) or laundry detergent, then wash the garment in the warmest water that is safe for it. Hang the item to dry, and do not use a dryer. Often an oil stain will seem to be gone when the item is still wet, so make sure not to use an iron or dryer on an oil-stained item until you are positive the stain is out. Sometimes you have to repeat the process. If a stain has an oily or waxy component and some other staining agent (such as coffee with cream or tomato sauce with olive oil in it) treat the oil stain first. 

Perspiration
Prevention: Use dress shields; avoid antiperspirants with aluminum-based compounds (the aluminum combined with your sweat causes the staining).

A trusted dry cleaner once leaned over the counter and whispered to me—presumably considering it a trade secret—that diluted ammonia is his first choice for soaking sweat-stained washable clothing. Some have success with mild agents such as a baking soda paste (mixed with water) or diluted white vinegar. 

My best solution for soaking out not-so-recent sweat stains has been an oxygen-based non-chlorine bleach, or hydrogen peroxide 3%. For me, these actually have worked to remove bleach-set, decades-old, angry yellow underarms stains in white cotton blouses. Specific products for sweat stains did not work better for me and are made of much more hazardous ingredients. Remember, if an oxygen bleach or peroxide seems to work a little, give it more time. Also, all caveats about washing fabric, such as dye bleed testing, should be observed.
 

About dyeing as a solution to an intractable stain: Unless you are really into DIY and don’t mind ruining a garment, don’t put a lot of stock in the possibility of dyeing your vintage to solve a stain issue. It doesn’t work well or easily without expertise, and you are likely to encounter trouble with the high temperature needed for a dye bath. I don’t know how the “just dye it!” mantra came into being, but it is simply not the panacea you might expect from the number of times you hear that recommendation.
 

Rust
Prevention: Do not use wire hangers. Remove covered buttons before soaking, change out any rusting fasteners. Watch out for rusty pipes that could drip on stored clothes. Avoid brushing against rusted surfaces. Both chlorine bleach and heat will set rust stains. 

You can sometimes win a rust stain battle by sprinkling salt on the stain, squeezing lemon juice on the salt, and then letting the garment sit in the sun to dry. It is possible to bleach colors out of fabric this way, but it can work wonders on some fabrics. 

You can try a commercial rust remover, which usually includes either oxalic or hydrofluoric acid. Rust removers are nasty stuff—toxic, poisonous, hazardous. Use them with discretion and great care. You must be sure to rinse the rust remover out thoroughly because it will break down fabric if left in. 
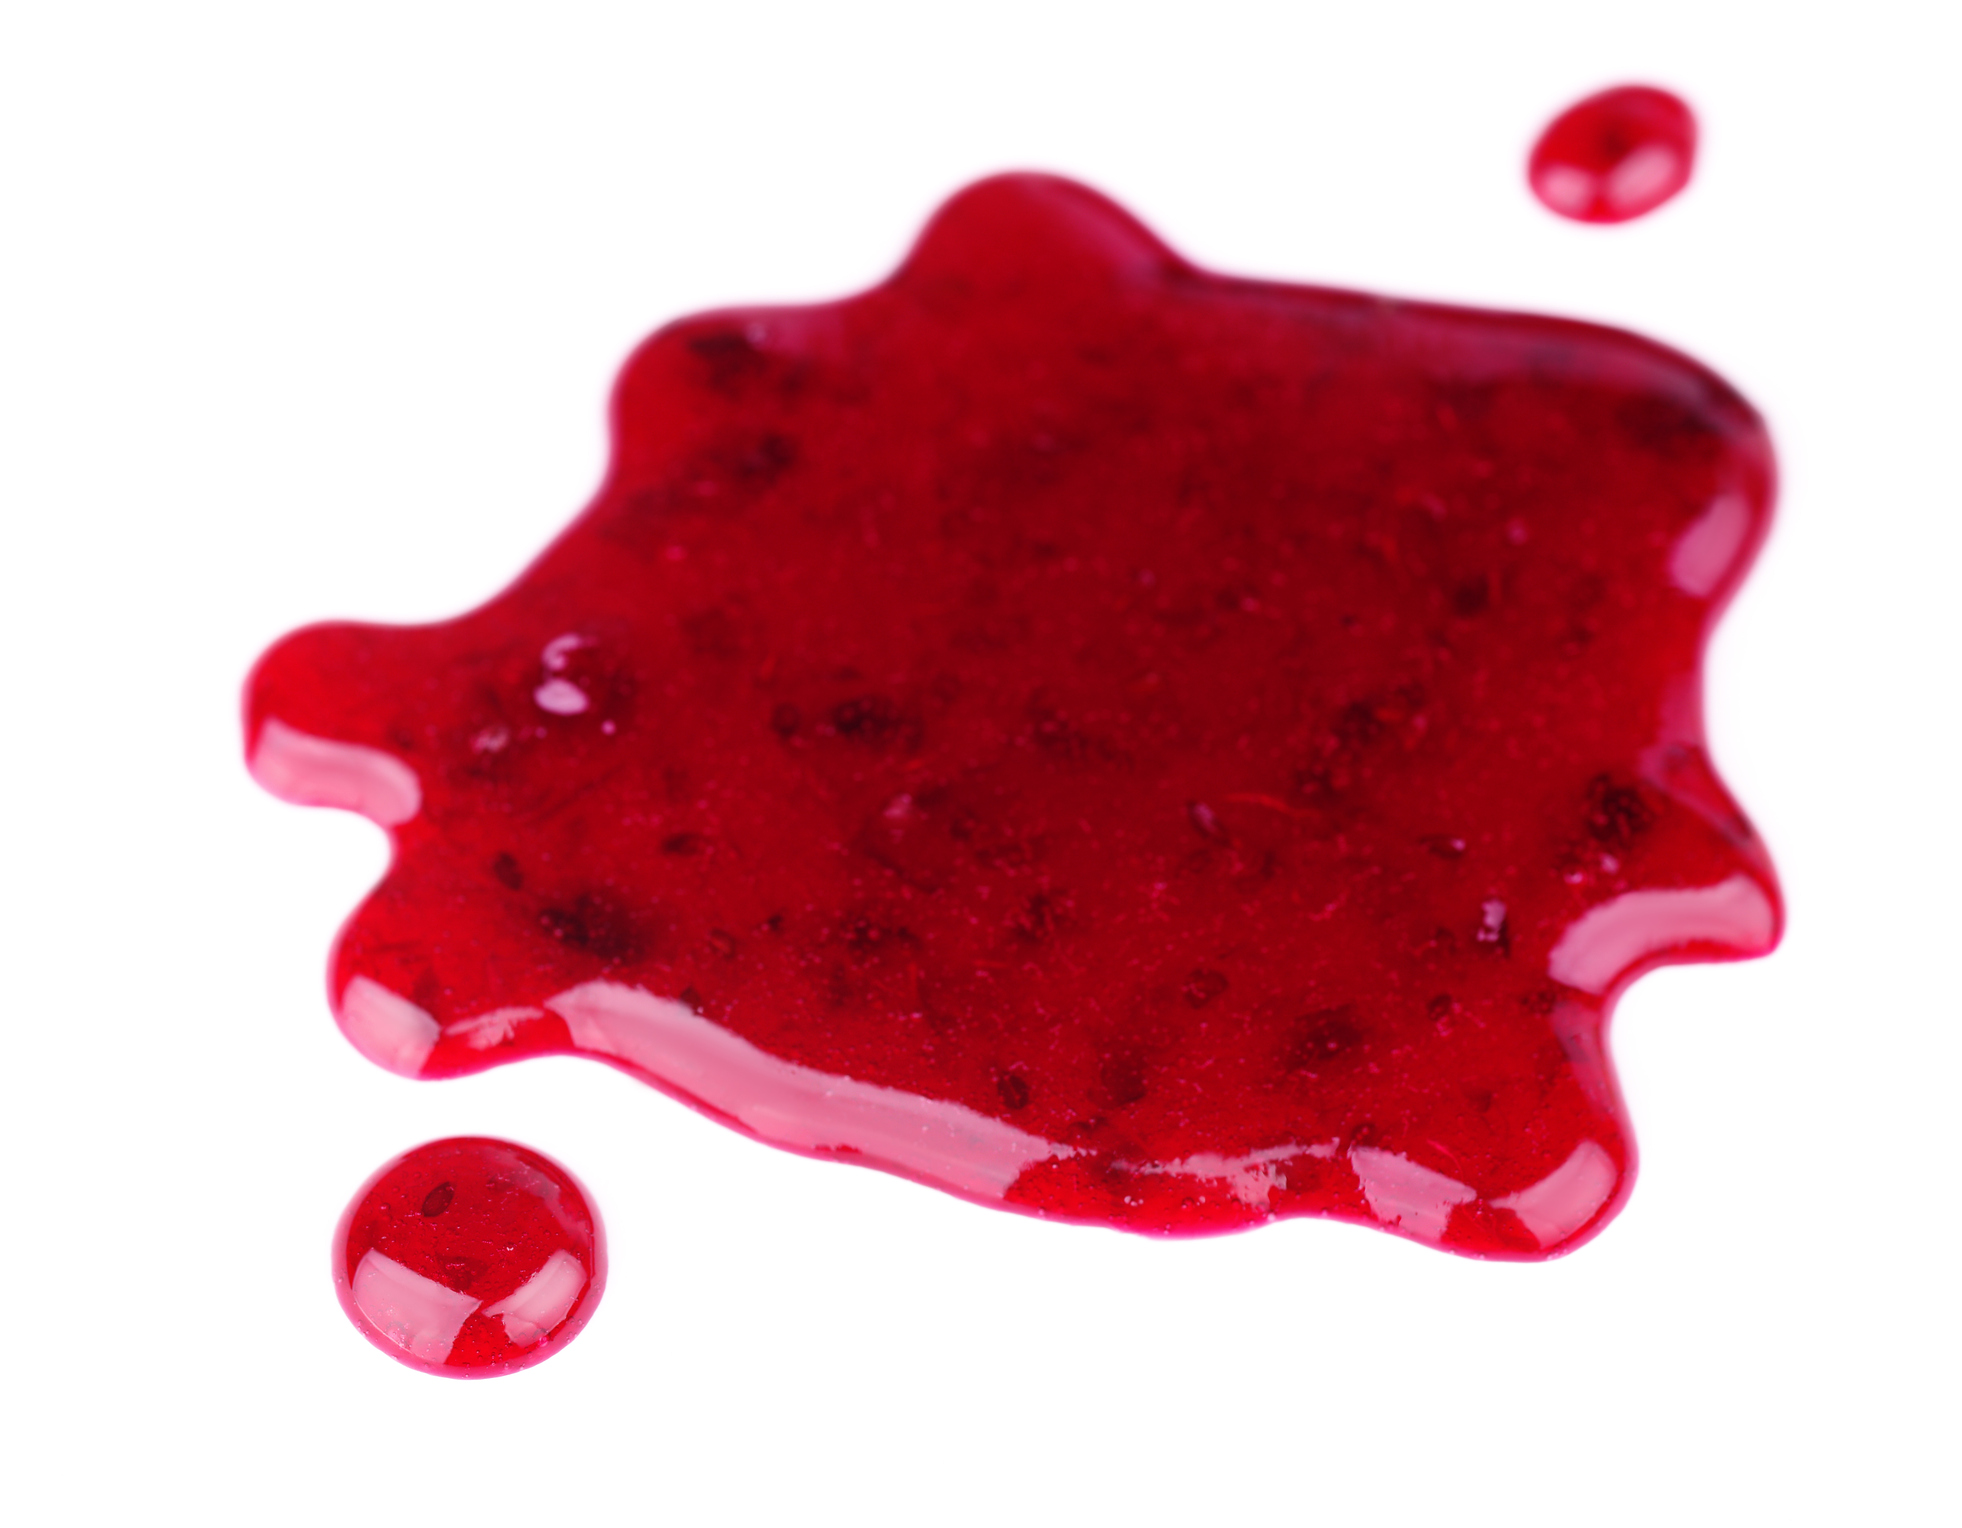
 

Wine, tea, coffee
Prevention: These are tannic stains, so easy to get while we are out enjoying ourselves in our vintage! Just try not to slosh, and you'll make your life easier.

Appropriately enough, a student in a summer program at the Department of Viticulture & Enology at the University of California, Davis did a test of fresh and dried wine stains in a variety of white fabrics, and the simplest and cheapest stain remover that worked best with many of the fabrics was one made of equal parts hydrogen peroxide 3% and dishwashing liquid. And by jove, I've been able to use this combination with success—I hope you can too! Cheers!


bde8515541a5ec226f4719211ec08468.jpg

Next time: Odor Removal Tips


If you’d like to see all my vintage care tips in one place, you might like my book Wear Vintage Now! Choose It, Care for It, Style It Your Way, available now!


Here are several of the items mentioned in this post. These items contain Amazon affiliate links, which can help me keep my business going. I only link to items I truly recommend for you, and would personally use.

44 Comments

Comment

Two recent Vintage Convergences

I'm working on the next post in my series on caring for vintage—working very hard to fill the gaps in my stain-removal knowledge. But while we wait for that to be completed, here are two recent Vintage Convergences. 

I call it a Vintage Convergence when I find a vintage ad, photo, or pattern with the same garment as one of my vintage finds. In the past year, none of these have surfaced—but in the past two days, I've found two.


The first came up as I researched a dress by the designer Chester Weinberg for listing in my Etsy shop. The dress is of outstanding quality, so I had to know as much as I could about it, and there it was, available in pattern form from the Etsy seller GransTreasures:

weinbergconvergence.jpg

The second convergence appeared while I was reading the great Glamourdaze blog this morning, including a post featuring photos of 1950s fashions in Kodachrome. Here, in a photo of a group of ladies dressed for a formal occasion, is a gorgeous magenta and black strapless gown that I have in my Etsy shop. I love this 50s woman's black tulle wrap as an ethereal finishing touch! 

magentablacklacedressconvergence.jpg

If you'd like to see more convergences, I share a Vintage Convergences Pinterest board with other vintage mavens.

Comment